Limited
System Controller Instructions
To access the user set up options in your Datahawk application you need to log in as the system 'CONTROLLER'. The controller password is normally only allocated to the general manager or a person designated to control all Datahawk system access and system security. The 'controller' login is the equivalent of a supervisor or administrator login for Datahawk systems.

Click the User Setup button after logging in with the CONTROLLER user name...

The Staff File screen will appear...

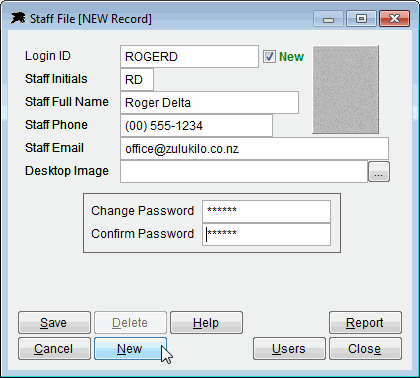
Step 1 - If you wish to add a new user, click the New button and add the staff person details. The usual format for 'the Login ID' is the users first name and first initial of his/her surname. Input a temporary password for the new user and save the record. Note - Existing users may change their own password any time after they login into the Datahawk system.
Step 2 - Load the required user by entering their login ID name. You can now set up the users access details and the menu permissions....

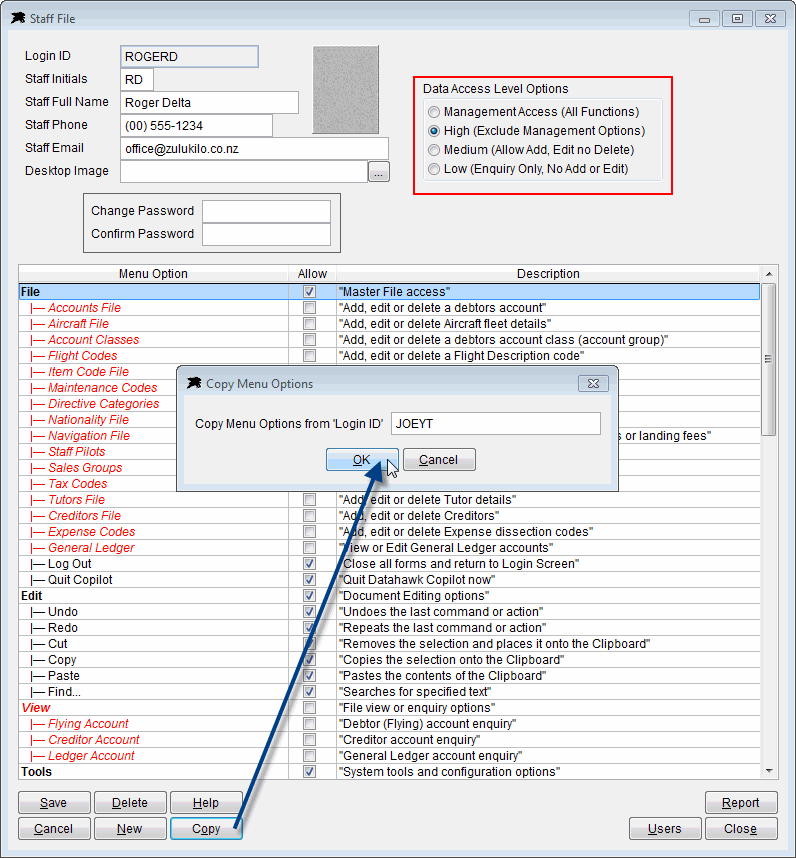
If you have loaded a new user record, you can click the Copy button to quickly give this login exactly the same permissions as an existing staff member or you may manually tick or un-tick menu items as required.
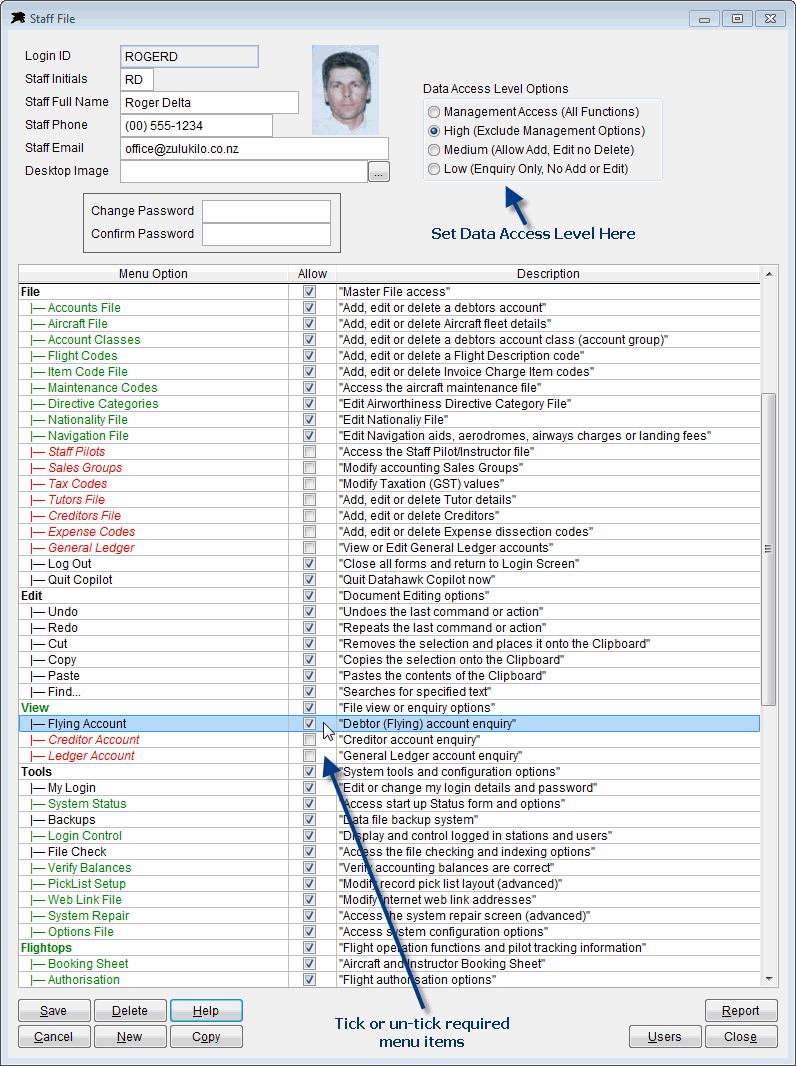
Double Click individual menu items to tick or un-tick them. Also check that the 'Data Access Level' is correct at the top of this page, then save the new user permissions.

Note: You may tick/un-tick Green or Red items only. Items that appear in Black are fixed and cannot be changed. Save the changes, close these screens, logout as Controller and log back in with your own login or the new users login to check the available menu options.
The Report button will produce a 'Menu Access' report displaying users who have permission to use the various menu functions.
