Limited
Photo Identification Options
The Datahawk Copilot system comes with a set of photo identification options to allow staff to load images for aircraft, pilots, students or staff members. These photos are displayed on several forms or windows in the software for quick identification of pilots, staff or aircraft.
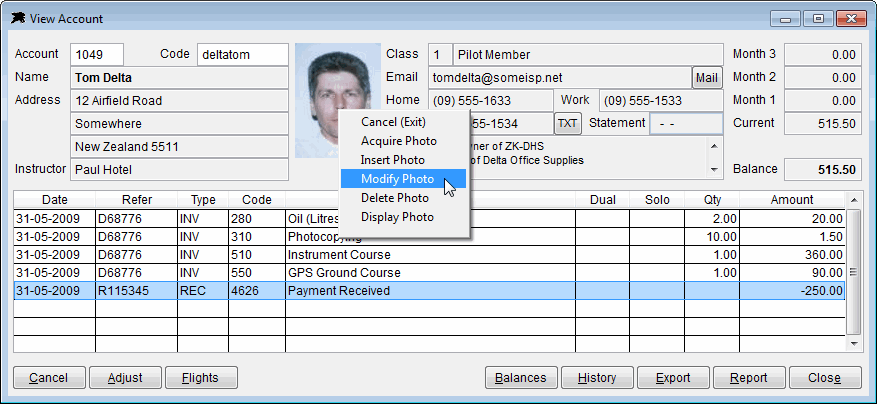
To access the photo options, simply click (or right click) the photo rectangle of most forms that show an identification photo. An exception to this is the flight booking editing screen which will only display existing photos. When you click in this area you will be presented with a popup menu...
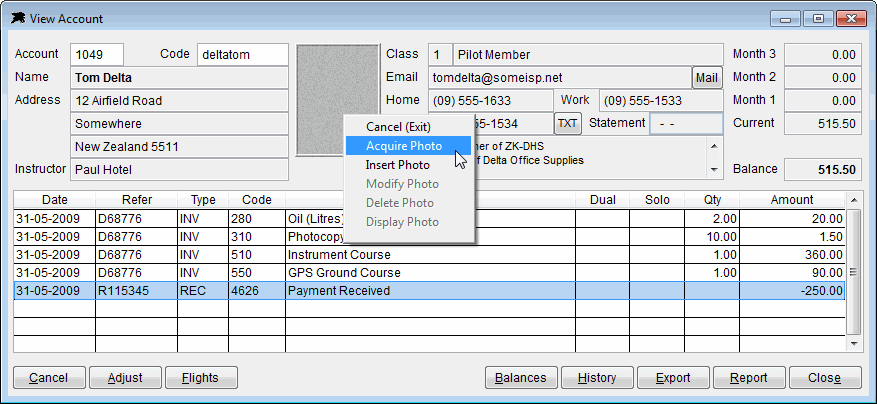
The first menu option 'Cancel (Exit)' simply closes the menu.
'Acquire Photo' allows you to copy a photo directly from many digital cameras (including modern cellphone cameras) if they are connected via a USB cable. The acquire function can also activate a suitable web camera connected to the PC to allow a still photo to be captured directly from the video camera. If you have a suitable scanner attached to the PC, this feature may also permit a live scan of a photo, document or a passport image if desired. Simply click the 'Acquire Photo' menu option to list available devices (sources) that can be accessed...
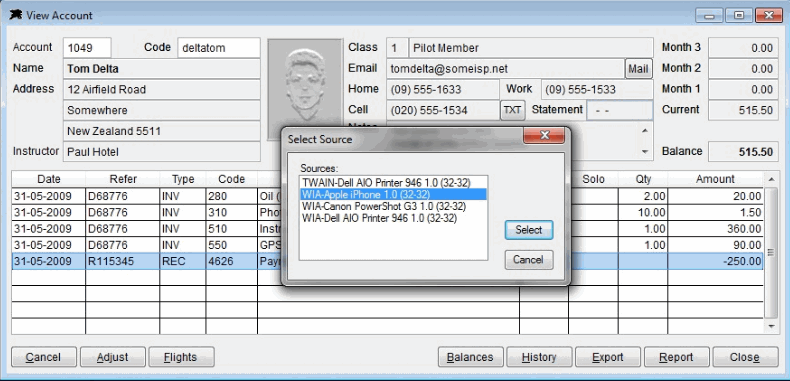
The example above shows that there are three imaging devices available. In this case a 'Canon Powershot G3' digital camera and 'Apple iPhone' are attached to this computer via USB cables. This computer/workstation is also connected to a 'Dell 946 Multi-Function Printer' with a built in scanner. These devices are all available for access. In the case of the iPhone and Canon camera, you will be able to choose an existing image that is already stored on the 'camera roll' or the memory card. The printer options will display scanner control windows which are supplied by your installed printer/scanner driver to allow you to scan a digital image directly into the Datahawk photo system.
Most digital cameras and devices can be accessed this way including tablet devices such as the Apple iPad however in some cases you may need to have the cameras driver installed before it will show as a source option. If you have a suitable web camera connected then it will also be listed as a source. If your connected web camera is not listed as a source, then it probably does not have the required 'twain' compatible drivers to be accessed in this mode. If you have a web cam that is not listed, you can try installing a Generic Video Twain Driver to find out if your webcam cam be accessed directly.
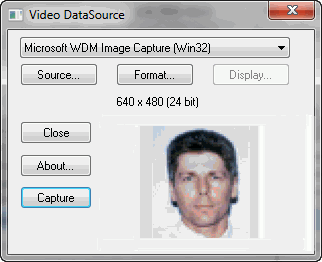
The following example shows a live webcam capture window...
A cellphone or digital camera photo acquisition will display images contained on the device in a window similar to the one below.
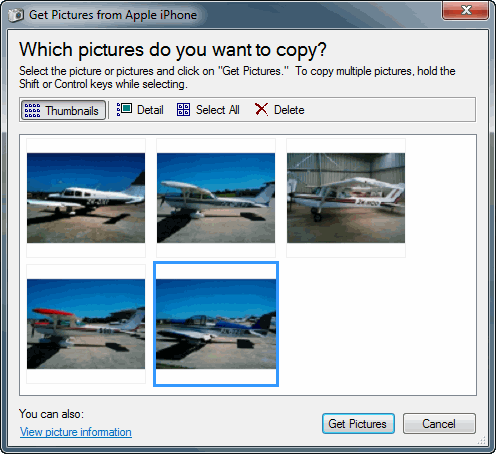
NOTE: The Datahawk photo function will only download a single selected image from the connected device even if you try to select all or more than one image in the 'Get Pictures' window.
Note: If you receive the following message when choosing a photo from a device and you cannot see your photo selection window, Hold down your ALT key and press TAB to reselect the 'Get Pictures' window. or if all else fails, unplug your camera from the USB cable and click Retry. This problem can occur when more than one program is accessing the same imaging device or if the photo selection window drops behind the Copilot desktop.
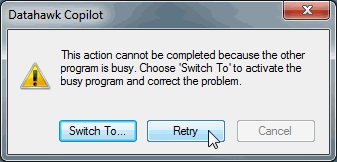
After selecting the required device, a thumbnail display of all photos on the camera will be displayed, a live webcam image with capture options (as above), or a scanner options window will appear. Choose, Capture or Scan the image you want and it will appear in the Datahawk Image Adjuster window (see below).
The 'Insert Photo' menu option simply allows you to choose an existing photo from any drive or folder on your computer or network. The Datahawk Image Adjuster window will appear with the selected image loaded...
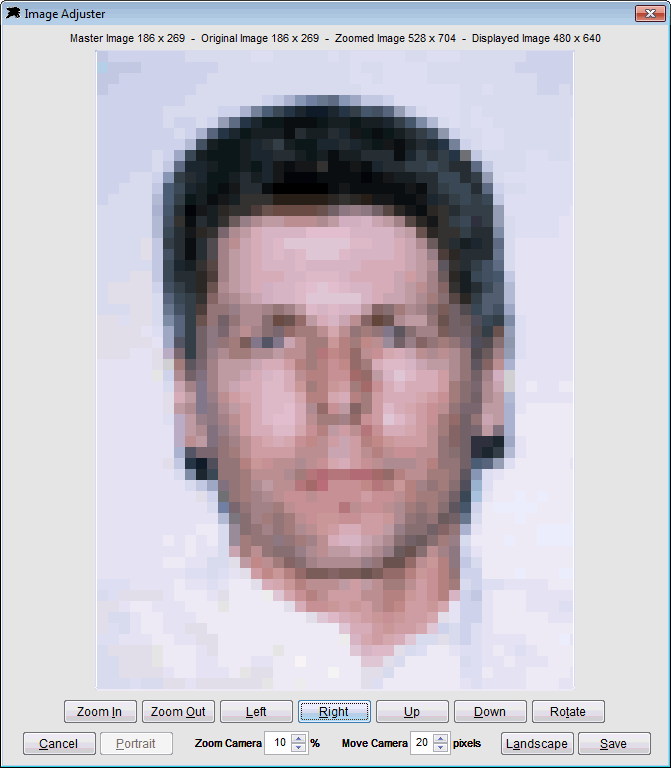
You may zoom, move or rotate the image to tidy up the size and alignment before saving the photo to the selected account or aircraft file. The original acquired photo is not changed in any way. Only a copy of the source image is taken, modified and stored in the Datahawk system. The photo adjuster will automatically resize the original image copy to either a 480 x 640 portrait image for pilots and staff or a 640 x 480 landscape image for aircraft when any new photo is loaded. A thumbnail image is also created for the resized photo. Click Save when ready or Cancel to escape.
'Modify Photo' ,'Delete Photo' and 'Display Photo', are self explanatory. These options become available for existing photos...
'Photo Identification Sheets' - In addition to simply displaying ID photos on the working screens of the system, there is a reporting option to print 'Photo Identification Sheets' for training courses or classes. To use this function, a Course Code (Key Code) needs to be created in the Pilot Information section and each student should then have that course loaded into the lower section of the Pilot Tracking screen. You may then run the 'Pilots (Course Photos)' report from the Report button options.