
Limited
Creditor Account (View or Adjust)
Select Creditor Account from the View Menu to view or adjust creditor transactions.
The 'History'
button will load all historical transactions for you to view if required.
The 'Copy' button will quickly duplicate an existing transaction into the
Creditors Invoice screen ready for editing. This is useful for regular repeating transactions.
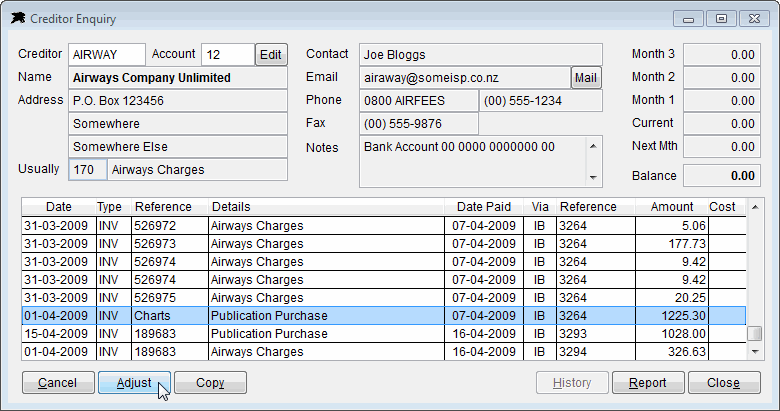
The 'Adjust' button will display various options for correcting mistakes or reversing incorrect transactions.
Important Note: You should try to avoid using the 'Adjust' button on older historical transactions because any changes to previous month payments or reversals will directly effect your year to date bank balance and reconciliation. Please read the following section that details how to adjust previous month transactions without effecting your bank account balances.
Historical Transaction Adjustment Procedure
For Example: If you need to change a wrong expense code posting or GST value on a previous month transaction that has been paid, the safest way to do so is to follow these steps....
Step-1 - Input and save a new 'un-paid' CREDIT invoice into the creditors account (as a -negative value) that duplicates the original previous month transaction (i.e. Make sure the original expense code, gross, GST and net values match the incorrect historical invoice).
Step-2 - Input and save a new 'un-paid' DEBIT invoice into the creditors account (as a normal invoice total matching the negative credit so that both lines add up to $0.00) with the corrected expense code, and or corrected GST value.
Step-3 - Open the Payments Screen, enter $0.00 as the payment total, then 'tick' both the matching CREDIT and DEBIT as paid and save the changes.
The result of these three steps will adjust the incorrect expense code posting or the GST value without changing any bank account details. You can do this at any time to 'fix' historical wrong expense group coding or GST values.
This is a 'safe' method to make adjustments to previous payments that are the correct 'paid' amount but that may have been posted to the wrong expense code or GST value.
With the above said, there may be rare cases where you need to cancel/reverse a previous months 'un-presented', 'lost' or incorrect Creditors payment.
In those unique cases, you can use the Adjust button functions on historical items, however, if you are unsure of the results, contact Datahawk and we
will explain a solution to avoid bank balance problems.
Current Month Transaction Adjustment Procedures
For 'Current Month' Transactions - You can choose to use the following Adjustment Options....
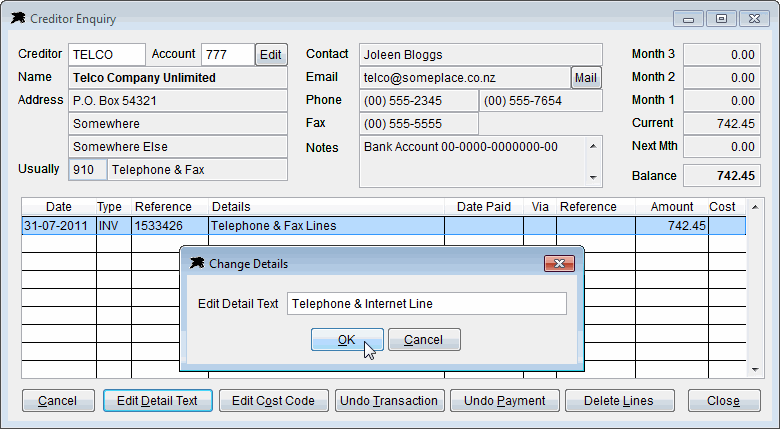
If the 'Edit Detail Text' button is used on a highlighted item, you will be able to edit the line description as in the example above.
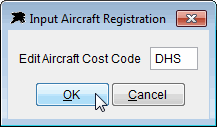
The 'Edit Cost Code' button will open the window above. You can use this to add, remove or change aircraft registrations on costing related expenses if they are missing or not correct without having to undo and reinput the expenses.
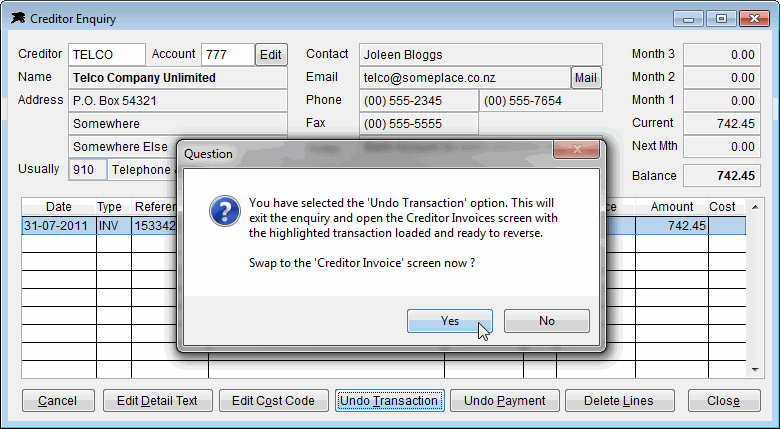
If the 'Undo Transaction' button is used, you will be presented with the question above. If you continue, the existing transaction will be passed to the Creditors Invoice screen for crediting the item if you wish.
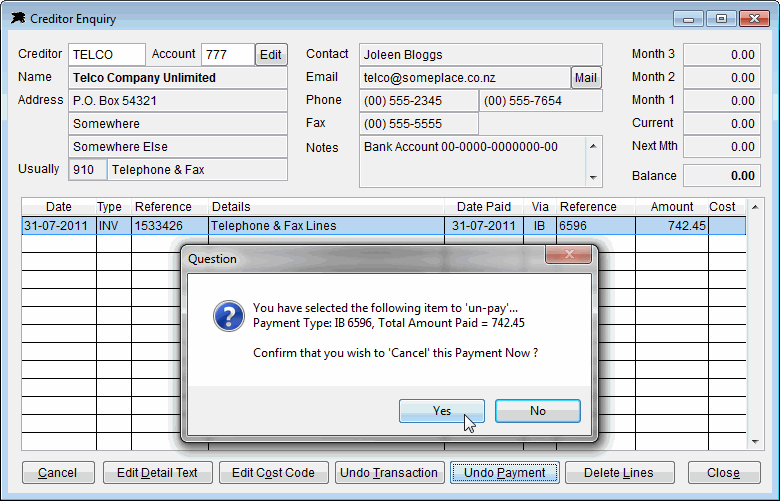
If the 'Undo Payment' button is used, the software will simply remove the payment and reset the transaction to unpaid. You cannot use this option on historical transactions because the previous accounting months have been closed off and finalised. To reverse a payment on a historical item, you will need to input a 'paid' credit invoice using the Creditors Invoice screen. The paid credit note effectively cancels the historical paid item.
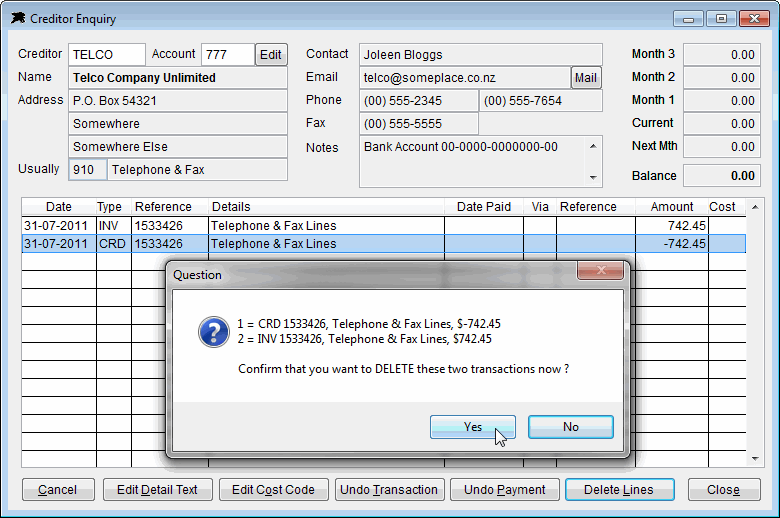
The 'Delete Lines' button can be used to remove a matching debit and credit items where you have input an incorrect transaction and then used the 'Undo Transaction' option to reverse the item. This is only permitted on current month transactions and is only a cosmetic option to tidy up unwanted debit and credit reversals. Historical transactions cannot be deleted this way because they effect finalised previous month accounting balances.
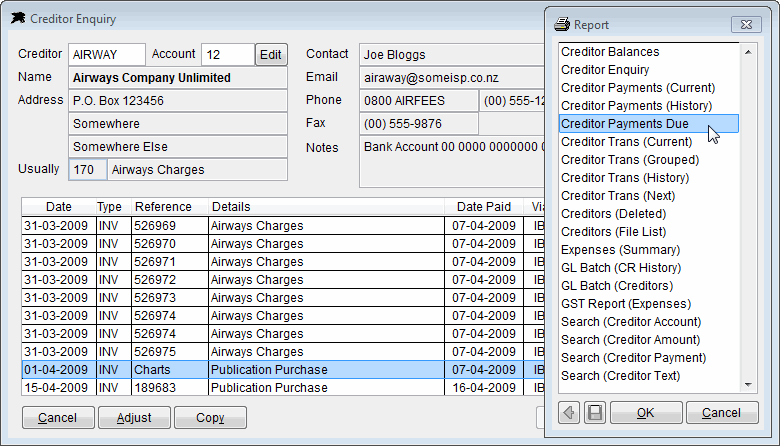
The 'Report' button will list the available Creditor File related related reports here. These and other reports can also be accessed from the Reports Menu